
Table of Contents
- What Commercial Solar System Design Actually Involves
- How Commercial Solar Panel Efficiency Affects Your Return
- Business Solar Energy Incentives and Payback Periods
- Grid Connection, Export Limitations and Compliance Standards
- The Commercial Solar Installation Process, Step by Step
- Commercial Solar Maintenance Checklist and Performance Auditing
- Frequently Asked Questions
Last Updated: September 10, 2026
What Commercial Solar System Design Actually Involves
Commercial solar design Adelaide businesses rely on matches a photovoltaic system to a site’s real energy consumption profile, roof structure and grid connection limits. It is not a panel-counting exercise. At MLG Electrical & Solar, we treat it as three linked decisions: how much energy you use, how much roof can carry an array, and how the system behaves on the grid for 25 years.
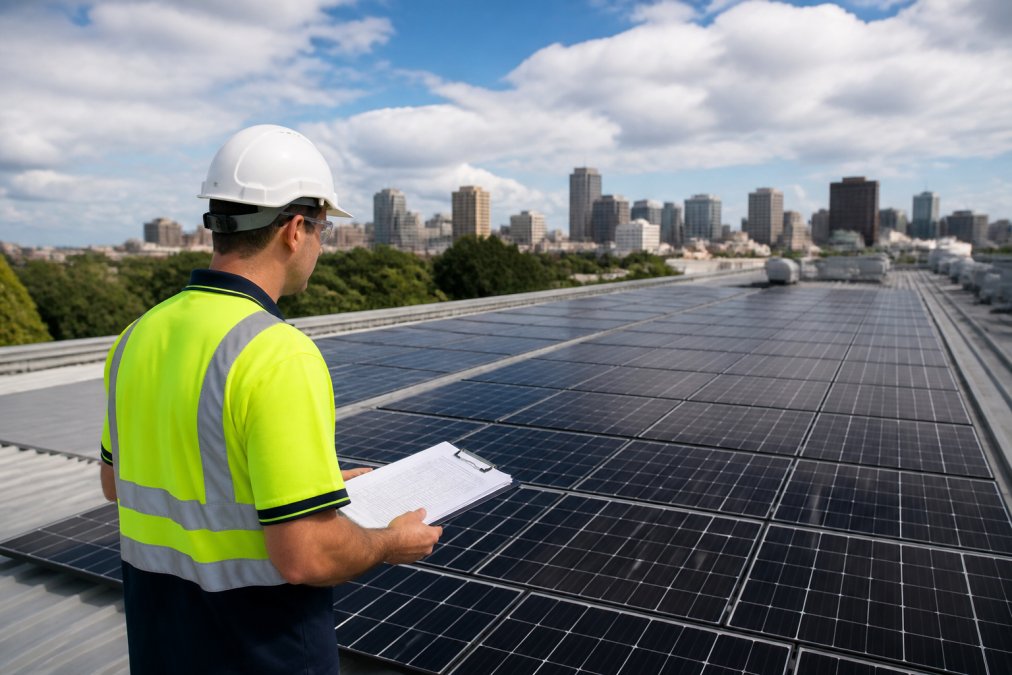
Clean Energy Council solar design and installation guide
Most quotes fail at step one: sizing from a quarterly power bill alone hides peak demand periods and seasonal swings.
Site Assessment and Energy Usage Analysis
Site assessment starts with an energy audit, not a roof measure. We pull at least 12 months of interval data to build a consumption profile: when you draw power, how much, and what it costs at peak demand.
A load analysis then separates baseload from shift-dependent loads. A cold store running 24 hours behaves nothing like an office with a 9-to-5 spike, and the two need different sizing.
Physical checks matter just as much:
- Rooftop structural integrity and purlin spacing
- Shading across the full year, not just at midday
- Electrical infrastructure capacity at the switchboard
- Site feasibility for cable runs and inverter placement
Skipping any of these produces a system that underperforms from day one.
System Sizing, Solar Array Layout and Equipment Selection
System sizing follows the data, not the sales target. We calculate kilowatt-peak (kWp) against daytime consumption, then model a solar array layout that avoids shading and keeps strings balanced.
Equipment selection comes last. Inverter efficiency, panel degradation curves and warranty terms decide long-term output far more than headline wattage. For most commercial sites, a well-laid-out 30 kWp array with quality inverters beats a cramped 40 kWp array.
Ask any designer for the shading analysis and the 25-year production model. If they can’t produce both, they’re quoting, not designing.
How Commercial Solar Panel Efficiency Affects Your Return
Commercial solar panel efficiency determines how much of your roof converts to bill savings, and it compounds over decades. Two systems with identical nameplate capacity can differ by thousands of kilowatt-hours a year once degradation, temperature derating and inverter losses are factored in. What matters is not datasheet efficiency but specific yield (kWh per kWp per year) the design can realistically deliver at your location, orientation and tilt.
What Actually Drives Specific Yield on a Commercial Roof
Four factors dominate, and they interact:
- Orientation and tilt. A north-facing array at optimal tilt out-produces an east-west split array of the same capacity, but east-west layouts often suit businesses with morning and afternoon load profiles because generation better matches consumption. The trade-off is total yield versus self-consumption.
- Temperature derating. Panels lose output as cell temperature rises above 25°C. On a metal roof in summer, cell temperatures climb well above ambient, and a panel with a lower temperature coefficient holds more rated output through the hottest part of the day, when commercial demand charges bite hardest.
- Shading and soiling. Partial shading on a string drags down the whole string unless the inverter uses module-level power electronics or multiple MPPT trackers. Bird droppings, dust and leaf litter on a low-pitch roof can quietly cost several per cent of annual yield.
- Inverter and balance-of-system losses. Every conversion step, DC to AC, cabling, transformer, shaves output. A high-efficiency inverter with dual MPPT tracking handles partial shading and mixed roof orientations better than a single-tracker unit.
Panel Degradation, Warranties and the Real Cost per Kilowatt-Hour
Panel degradation is the slow bleed most owners never see. Quality panels lose output gradually across their warranted life; cheap panels lose it faster, and the difference shows up in years five to fifteen, after the warranty claim window has closed. When comparing quotes, look past headline wattage and check:
- The product warranty (covers manufacturing defects) versus the performance warranty (guarantees a minimum output percentage at a given year).
- The degradation curve, a typical quality panel guarantees around 80-87% of original output at year 25, but the shape of the curve matters. A panel that holds output flat for 10 years then drops is different from one that degrades linearly.
- The inverter warranty and whether an extended warranty is available, because inverters typically need replacement once during a 25-year system life.
The cheapest system per kilowatt is rarely the cheapest per kilowatt-hour over 25 years. A design costing slightly more upfront but delivering higher specific yield and lower degradation usually wins on lifetime cost of energy, the number a CFO should compare.
Smart Monitoring: Turning Efficiency Data into Actionable Signals
Smart monitoring turns all of this into something you can act on. Instead of a monthly bill surprise, you get alerts when a string drops below expected output, which usually means a fault rather than weather. A good platform should give you:
- String-level or module-level output compared against the design production model.
- Inverter fault and error logs with timestamps.
- Export and import data aligned with your retailer’s tariff windows.
- Automated alerts when output falls outside an expected band for the weather and time of year.
The cheapest system per kilowatt is rarely the cheapest per kilowatt-hour delivered over 25 years. Compare specific yield, degradation curves and warranty terms, not just the sticker price.
Ask any designer for the shading analysis and the 25-year production model. If they can’t produce both, they’re quoting, not designing.
Business Solar Energy Incentives and Payback Periods
Business solar energy incentives reduce upfront capital, shortening the payback period. In Australia, the main federal mechanism is the Small-scale Renewable Energy Scheme (SRES), which issues Small-scale Technology Certificates (STCs) based on system size, location zone and year of installation. STCs are tradeable, so their value fluctuates and your rebate depends on the certificate price when your system is registered.
How STCs Are Calculated and Why the Value Steps Down
STC numbers combine the system’s rated capacity, your postcode’s zone rating and the years remaining in the scheme’s deeming period. The deeming period reduces each year, so the same-sized system installed later generates fewer certificates, a step-down that makes early action financially rational, not a sales tactic.
STC rebates are typically calculated at the point of sale and deducted from your quote, so you don’t wait for a cheque. The installer or retailer usually handles the assignment of certificates. Check the Clean Energy Regulator’s current STC guidelines for the rates that apply to your install date, and confirm whether your installer is a registered agent.
Feed-in tariffs are separate, set by your retailer rather than the government, and commercial rates are usually lower than residential. Treat feed-in income as a bonus, not the business case, which rests on self-consumption, the proportion of generated energy used on site rather than exported.
Payback Period: How to Model It Properly
A payback period is only as good as the assumptions behind it. A credible model should show you:
- Annual generation from the design production model, not a generic estimate.
- Self-consumption ratio, what percentage of generation offsets your retail tariff versus what is exported at a lower feed-in rate.
- Tariff escalation, how your electricity price is assumed to move over the system life.
- Degradation, the annual output decline from the panel performance warranty.
- Operating costs, monitoring, insurance, inverter replacement and periodic cleaning.
- Incentive treatment, the STC rebate netted off capital cost.
Most commercial systems in Australia are modelled on a simple payback of roughly four to seven years, but that range depends heavily on daytime load, tariff structure and self-consumption. A business with heavy daytime demand and a high retail tariff pays back faster than one with low daytime load and a generous feed-in tariff.
Financing Models: PPA vs. Outright Purchase vs. Lease vs. Chattel Mortgage
Financing splits into several routes, and the right one depends on your cash position, tax situation and tenure at the site.
| Model | Upfront Cost | Who Owns the System | Best For |
|---|---|---|---|
| Outright purchase | Full capital outlay | You | Businesses with capital and a long tenure at the site |
| Power purchase agreement (PPA) | Minimal | Third party | Tenants or businesses preserving cash flow |
| Solar lease | Minimal | Third party | Short-term occupancy |
| Chattel mortgage | Deposit plus repayments | You | Businesses wanting ownership with spread payments |
Outright purchase delivers the strongest return if you own the premises and can use the capital. A power purchase agreement (PPA) trades some return for zero upfront cost but locks you into a rate schedule for 10 to 25 years. Under a PPA, the third party owns the system and sells you generated electricity at an agreed rate, usually below your retail tariff but above the feed-in tariff.
A chattel mortgage lets you own the system while spreading the cost, with interest and depreciation potentially tax-deductible depending on your structure. A solar lease is similar to a PPA but usually charges fixed rental rather than a per-kilowatt-hour rate. Each structure has different accounting and tax treatment, so involve your accountant before signing.
A PPA signed on a five-year lease with a ten-year term creates a real problem at exit. Check the assignment clause, the buy-out schedule and the early-termination fees before you sign.
Ask for the payback model as a spreadsheet, not a slide. If the assumptions aren’t visible, you can’t stress-test them, and you can’t compare quotes on a like-for-like basis.
Grid Connection, Export Limitations and Compliance Standards
Grid connection is the constraint most quotes ignore. Your distributor sets an export limit based on local network capacity, and that limit can be zero in some areas. A system designed without checking this can be built to export and then approved to export nothing.
Two rules govern the design:
- Export limiting caps what you send to the grid, which changes inverter selection and system sizing.
- Zero-export design requires either battery storage capacity or consumption-matched sizing so nothing is wasted.
Compliance sits alongside this. Installations must meet AS/NZS 5033 for photovoltaic arrays, AS/NZS 4777.2 for grid connection via inverters, and AS/NZS 3000 for electrical wiring. Your installer must hold the relevant electrical licence, and the design must be signed off by a licensed electrician, not a salesperson.
Australian Energy Regulator guidance on distributed energy resources
The Commercial Solar Installation Process, Step by Step
Installation runs to a fixed sequence. Rushing any stage is how systems end up underperforming or failing inspection.
Total Time: 4-8 weeks from signed contract to commissioning, depending on system size and grid approval.
What You’ll Need: 12 months of interval data, roof access, switchboard documentation, and distributor approval.
- Site assessment and energy audit [1-2 weeks] – Data collection, physical inspection, shading analysis. Expected result: a documented consumption profile and site feasibility report.
- System design and engineering [1-2 weeks] – Array layout, string design, inverter selection, structural certification. Expected result: stamped design drawings.
- Grid connection application [2-6 weeks] – Submitted to your distributor, with export limits confirmed in writing. This is usually the longest wait.
- Installation [2-5 days on site] – Mounting, array install, inverter and switchboard work, cabling. Expected result: a physically complete system, not yet energised.
- Commissioning and inspection [1-2 days] – Testing, compliance checks, meter configuration, monitoring setup. Expected result: signed compliance certificate and live monitoring.
- Handover [same day] – Documentation, monitoring walkthrough, maintenance schedule.
Commercial Solar Maintenance Checklist and Performance Auditing
A commercial solar maintenance checklist protects the return you’ve already paid for. Panels are the most reliable part of the system; inverters, isolators, cabling and connectors cause most faults.
Run this at least annually, and after any severe weather:
- Visual inspection of panels for cracks, hotspots and soiling
- Check mounting hardware and roof penetrations for corrosion
- Inspect DC isolators and connectors for heat damage
- Review inverter fault logs and error history
- Confirm monitoring is reporting all strings
- Compare actual output against the design production model
- Thermal imaging scan of array and switchboard
- Test emergency shutdown functionality
Post-installation performance auditing is where most providers stop. Comparing real output to modelled output tells you whether the system does what it was sold to do, and it’s the only way to catch a slow fault before it costs a year of generation.
Log your meter readings monthly for the first year. It gives you a baseline that makes any future fault obvious in days rather than months.
Commercial solar design fails quietly. A system can be installed, compliant and running, yet deliver a fraction of its modelled output because the load analysis was thin or the export limit was never checked. That gap is where MLG Electrical & Solar works differently: our team of qualified electricians prioritises technical knowledge over salesmanship, designing and installing systems from 1kW to 1mW with full compliance documentation and 24/7 emergency support. Get started with MLG Electrical & Solar and get a design built around your actual energy data, not a template quote.
Frequently Asked Questions
What factors influence commercial solar system design?
The main factors are your energy consumption profile, roof size and structural integrity, shading, and your available switchboard capacity. A load analysis shows when you use the most power, so the system can be sized to match. Grid connection limits and your budget for a battery also shape the final design. A good designer reviews 12 months of electricity data before recommending anything.
How does commercial solar design impact energy efficiency?
Good commercial solar design matches generation to your actual load, so more of the power you produce is used on site instead of exported at a lower feed-in tariff. Correct tilt, orientation and inverter selection lift output, while smart monitoring tracks performance. Pairing solar with power factor correction and energy-efficient lighting reduces demand further, which lowers both your bills and your payback period.
What is the process for designing a commercial solar installation?
It starts with a site assessment and energy audit, including a review of your electricity bills and a roof inspection. The designer then models system sizing, array layout and equipment, checks grid connection and compliance requirements, and prepares a proposal with projected savings and payback. Once approved, the installation is scheduled, commissioned and connected, followed by monitoring and maintenance.
What are the regulatory requirements for commercial solar in South Australia?
Commercial systems must comply with Australian Standards, including AS/NZS 5033 for installation and AS/NZS 4777 for grid connection, and be installed by a licensed electrician. Your network distributor must approve the connection, and larger systems may need export limiting. Your installer should handle the paperwork, including STC rebate claims and any council or building approvals that apply to your site.
How do I choose the right solar system size for my business?
Start with a load analysis of at least 12 months of interval data to find your peak demand and daytime consumption. Size the array to cover the daytime load first, since that is where the savings are highest. If roof space or switchboard capacity is limited, a smaller system with battery storage can work better. A designer should show you the payback for two or three size options before you commit.
How much maintenance does a commercial solar system need?
A commercial solar maintenance checklist should cover panel cleaning, thermal imaging of connections, inverter checks, and a review of monitoring data at least twice a year. Most systems need a professional inspection annually, plus cleaning in dusty or high-pollen areas. Regular checks catch faults early and protect both output and warranty coverage.