Table of Contents
- First Steps: Check Your Solar System’s Daily Output
- How to Read Solar Inverter Error Codes
- Visual Inspection: Spotting Hot Spots and Physical Damage
- Testing Solar Panel Performance with a Multimeter
- Solar Panel Cleaning Frequency and Its Impact
- Your Solar System Maintenance Checklist
- When to Call a Professional vs. DIY Troubleshooting
- Conclusion: Restore Your System’s Energy Yield
- Frequently Asked Questions
Last Updated: September 7, 2026
When your electricity bill climbs despite sunny skies, the culprit is usually a drop in solar panel performance. Troubleshooting the issue early separates a minor fix from a costly system failure. In this guide, we walk you through diagnostic steps, from reading your inverter display to testing individual panels with a multimeter.
Solar panel performance is the measure of how much electrical energy your photovoltaic system converts from sunlight. A sudden drop in output rarely means the panels themselves are faulty. More often, the cause is something simple: a dirty surface, a shaded corner, or a loose connection. Below, we’ll show you exactly how to trace the problem, what you can safely fix yourself, and when to call a licensed professional.
First Steps: Check Your Solar System’s Daily Output
Start your diagnosis with the data you already have. Your inverter display or monitoring app shows the kilowatt-hours your system generates each day. Compare today’s figure against the same period last week or last month. A performance drop of more than 20 percent warrants investigation.
The key is establishing a baseline. Many systems produce less in winter due to lower solar irradiance, so compare against similar weather conditions. Most modern inverters log historical data, and many monitoring apps let you view daily, weekly, and monthly trends. If your system has smart monitoring, check for alerts about individual strings or panels rather than just total output.
Interpreting Smart Monitoring App Data
Modern solar monitoring apps (such as those from Fronius, SolarEdge, or Enphase) provide far more than a daily energy total. They can show per-panel or per-string performance, voltage and current curves, and even alert you to specific faults. Here’s how to use that data effectively:
- Per-panel or per-string output: If your app shows individual panel or string production, compare panels in the same orientation and tilt. A panel producing significantly less than its neighbours (e.g., more than 10% difference) may be shaded, dirty, or faulty.
- Voltage and current curves: On a clear day, the current curve should roughly follow solar irradiance, rising to a midday peak and falling in the afternoon. A flat or erratic current curve can indicate a bypass diode failure, shading, or a string mismatch.
- Alerts and notifications: Set up push notifications for system faults. Many apps will flag underperformance or inverter errors before you notice a bill increase.
- Historical trend analysis: Use the app’s historical view to spot gradual declines. A slow downward trend over months often points to soiling or panel degradation, while a sudden drop suggests a fault.
Using Your Electricity Bill as a Cross-Check
Your electricity bill is a lagging indicator, but it helps confirm a performance issue. Compare your net energy import/export over the same billing period last year, adjusting for changes in usage. If your solar output has dropped, you’ll see higher imports or lower feed-in credits. However, remember that seasonal variation and changes in your own consumption can obscure the signal, so use the bill as a secondary check, not the primary diagnostic.
Record your system’s output on a clear, sunny day each season. This seasonal baseline makes future troubleshooting far easier, because you can instantly spot whether today’s generation is genuinely abnormal for the conditions.
What to Do When You Spot a Drop
If your monitoring data shows a clear drop, don’t panic. First, rule out obvious causes: recent shading from tree growth, a new structure, or heavy soiling. Then move on to the inverter error codes and visual inspection steps in this guide. If the data points to a single panel or string, you can test that component directly with a multimeter (see later sections).
How to Read Solar Inverter Error Codes
Solar inverter error codes are your system’s first diagnostic message. When output drops, the inverter display often shows a code that points directly to the fault. Common codes indicate grid voltage issues, insulation faults, or high panel temperatures.
Grid voltage errors are the most frequent. Australian grid voltage sometimes sits above the inverter’s acceptable range, causing it to shut down for safety. This usually resolves itself, but persistent codes need professional attention. Insulation resistance faults suggest moisture ingress or damaged cabling, which requires immediate inspection.
| Error Code Type | Common Cause | Typical Action |
|---|---|---|
| Grid voltage fault | High grid voltage | Wait for auto-recovery; call if persistent |
| Insulation fault | Moisture or cable damage | Professional inspection required |
| Temperature warning | Poor ventilation or hot weather | Check airflow around inverter |
| String fault | One panel underperforming | Test individual panels |
If you see a flashing red light or an unfamiliar code, consult your inverter manual. Most manufacturers list error codes with recommended actions. Do not reset the inverter repeatedly without understanding the underlying issue, as this can mask a developing fault.
Visual Inspection: Spotting Hot Spots and Physical Damage
A visual inspection catches many problems before they appear on your monitoring data. Hot spots, micro-cracks, and delamination reduce panel output and can worsen over time. Walk around your array and look for discolouration, burn marks, or areas where the glass appears hazy.
Hot spots occur when cells in a panel operate at higher temperatures than their neighbours, often due to shading, dirt, or internal damage. They reduce the panel’s overall output and accelerate degradation. Look for shadows from nearby trees or new structures, as shading analysis is critical. Even a single shaded cell can cut a whole string’s production because bypass diodes route current around the affected area.
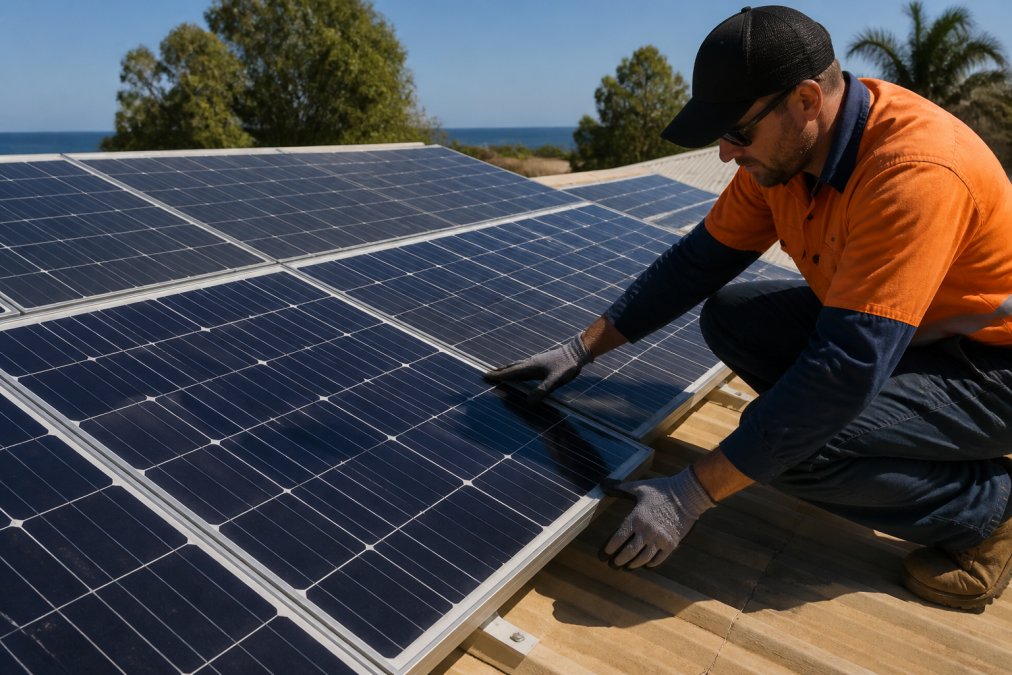
Check the physical mounting as well. Loose rails or brackets allow panels to shift, stressing the wiring and potentially causing micro-cracks. Inspect the DC isolator and AC circuit breaker for signs of overheating or burning. If you notice any damage to the glass or backsheet, call a professional rather than attempting a repair yourself.
Never open the DC isolator or inverter cover while the system is generating. Solar panels produce live DC voltage whenever light hits them, even on overcast days. Opening electrical enclosures without isolating the system first risks serious electric shock.
Testing Solar Panel Performance with a Multimeter
When visual checks reveal nothing, test the panels electrically. Solar panel performance testing with a multimeter confirms whether each panel delivers the voltage and current it should. This requires working with live DC electricity, so take precautions.
Before testing, isolate the array by switching off the DC isolator. Use a multimeter rated for DC voltage and current at the levels your system produces. You will measure two key values: open-circuit voltage and short-circuit current.
Measuring Open-Circuit Voltage
Open-circuit voltage is the maximum voltage a panel produces with no load attached. Each panel has a rated voltage printed on its label, usually around 40 to 50 volts for residential panels. Disconnect the panel’s positive and negative leads, then measure across them in bright sunlight.
A reading significantly below the rated value suggests cell damage, bypass diode failure, or a wiring issue. Compare readings across panels in the same string; they should be similar. One low panel drags down the entire string’s output, so identifying the weak link restores performance.
Measuring Short-Circuit Current
Short-circuit current measures the panel’s current output when the positive and negative terminals are connected through the meter. This value depends heavily on solar irradiance, so test on a clear day around midday for meaningful results. Set the multimeter to the appropriate DC amp range before connecting.
Connect the meter leads across the panel terminals, then read the current. A panel producing far less current than its rated value likely has dirt, shading, or internal damage. Remember that short-circuit current testing creates a brief high-current condition, so use properly rated leads and do not touch exposed terminals.
Solar Panel Cleaning Frequency and Its Impact
Dirt, dust, bird droppings, and leaf litter all block sunlight and reduce energy yield. Solar panel cleaning frequency depends on your local environment. In dry, dusty areas or near busy roads, panels may need cleaning every few months. In rainy climates, natural rainfall often handles the job.
The impact of soiling is real but often overstated. Light dust might reduce output by a few percent, while heavy buildup such as bird droppings or dried leaves can cause significant losses and create hot spots. Clean panels with water and a soft brush or squeegee, ideally in the early morning or evening when they are cool.
Cleaning panels yourself is safe if you can reach them from the ground or a stable position. Never walk on panels, use abrasive materials, or apply high-pressure water, as these cause micro-cracks and void warranties. If panels need cleaning on a steep or high roof, hire a professional with proper safety equipment.
Your Solar System Maintenance Checklist
A solar system maintenance checklist keeps small issues from becoming expensive repairs. Most residential systems need attention twice a year, with additional checks after severe weather. Follow this routine to protect your investment.
- Review inverter display and monitoring app for error codes or alerts
- Record current daily output and compare to seasonal baseline
- Visually inspect panels for cracks, discolouration, or debris
- Check for new shading sources such as tree growth or structures
- Clean panels if visibly dirty or if output has dropped
- Inspect visible wiring, DC isolator, and AC circuit breaker for damage
- Check inverter ventilation and clear any obstructions
- Schedule professional inspection every two to three years
Preventative maintenance extends panel lifespan and maintains system output. Panel degradation is normal, typically around 0.5 percent per year, but accelerated degradation signals a problem. Keeping the system clean and well-ventilated slows this process and protects your energy yield.
When to Call a Professional vs. DIY Troubleshooting
DIY troubleshooting is appropriate for visual inspections, cleaning, and monitoring data review. Professional help becomes necessary for electrical testing, inverter repairs, and any work involving live wiring. The safety threshold is simple: if you must open an electrical enclosure or work at height, call a licensed electrician.
Warranty considerations also guide this decision. Most panel and inverter warranties require professional installation and service. DIY repairs can void coverage, so check your warranty terms before attempting anything beyond basic maintenance. A qualified technician also performs a full system health check, including testing voltage drop, current leakage, and string configuration.
Clean Energy Regulator guidance on solar system maintenance recommends regular professional inspections to keep systems operating safely and efficiently.
For homeowners, MLG Electrical & Solar brings over a decade of experience in electrical and solar solutions. Our team of qualified electricians prioritises technical knowledge over salesmanship, so you get an honest assessment of what your system needs. We offer special discounts for elderly customers and 24/7 emergency support.
Conclusion: Restore Your System’s Energy Yield
Troubleshooting solar panel performance comes down to a systematic approach: check your monitoring data, read the inverter codes, inspect the panels visually, and test electrically when needed. Most performance drops trace back to simple causes like dirt, shading, or a single faulty panel, and catching them early preserves your system’s output for years.
When the problem exceeds your comfort level, professional diagnosis protects both your safety and your warranty. Australian Competition and Consumer Commission solar panel buying guide advises consumers to use qualified installers for repairs and maintenance. If your system is underperforming, contact MLG Electrical & Solar for a professional assessment.
Solar troubleshooting is rarely as complex as it seems, but it does require the right knowledge and respect for electrical safety. At MLG Electrical & Solar, our decade of experience in residential and commercial solar means we have seen most performance issues. Get started with MLG Electrical & Solar and let our qualified team assist you. Solar Victoria advice on maintaining solar panel systems offers additional resources for homeowners.
Frequently Asked Questions
How do I know if my solar panels aren’t working properly?
The clearest sign is a drop in system output compared to your historical data. Check your inverter display or monitoring app for error codes and compare your daily kilowatt-hours against the same time last month. A physical inspection for dirt, shading, or visible damage like micro-cracks can also reveal issues. If your electricity bill has jumped despite similar weather, your solar panel performance is likely suffering.
What is the 20% rule for solar panels?
The 20% rule is a common benchmark for action: if your solar system’s daily energy yield drops more than 20% below its normal average for your area and weather conditions, you likely have a fault that needs attention. This threshold accounts for normal variations like seasonal tilt and brief cloud cover. Before assuming a fault, check for temporary issues like heavy dirt or new shading from tree growth.
How often should solar panels be cleaned to maintain performance?
In most Australian conditions, cleaning every 6 to 12 months is sufficient to prevent dust and debris from hurting efficiency. You may need to clean more often if you live in a dusty area, near construction sites, or where birds are a problem. Rain helps but does not fully remove stubborn grime. If you notice a performance drop after a dry spell, start with the solar system maintenance checklist before cleaning.
When should I call a professional for solar system repairs?
Call a licensed electrician if you see error codes on your inverter you cannot clear, notice physical damage like cracks or delamination, or detect burning smells. Working with DC electricity from solar panels is dangerous, even with the system shut down. Attempting DIY repairs on wiring, the DC isolator, or the inverter itself can void your warranty and create serious safety risks. If your multimeter tests show voltage readings far outside the expected range, professional fault diagnosis is the safest next step.